Maximizing the Individual Practice Periods
Among players and coaches, the consensus seems that their favorite period of practice is team-oriented. Most practices are geared towards team and group work — inside run, seven-on-seven, routes versus air, and special teams. With practice being tilted heavily towards team and group work, this magnifies the importance of your 10 to 15 minutes of individual time. As coaches, how do we ensure that these periods are as productive as we need them to be especially during game week?
The answer is simple — improve our individual period.
 The individual period is where the fundamental foundation is laid despite in many cases being one of the shortest periods of practice. Individual periods may be the first time players are introduced to certain fundamental techniques that are relevant for that week’s game plan. Wide receiver coaches generally have one of the largest units, in terms of numbers, behind the offensive line. How does one coach working with 12 to 18 athletes ensure that he or she is maximizing their time? Repetition. Repetition. Repetition. To get the most reps out of practice and utilize players’ time you need to use a system that maximizes the limited individual time you have.
The standard acceptable practice model for years involves one rep, by one player, being coached by one coach, and everyone standing and watching. By the time each student-athlete goes and you make coaching points, the individual period will be over. What the drill circuit system aims to achieve is essentially destroying this paradigm. The drill circuit is designed to have everybody working at the same time in different areas on different things. This eliminates the boredom of standing around at practice and allows you as a position coach to get all your players reps. The circuits have emerged as one of the key tools that allow us to develop all of our players in the unit rather than focusing on only “the stars”.
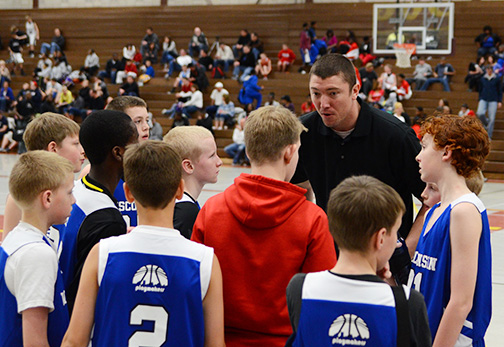
To properly execute the logistics of individual period drill circuits, it is critical that every coach and player involved be briefed beforehand. This briefing can be a pre-practice meeting. The briefing can be during film review or it can be during the stretch. It is essential that everybody knows what circuit group they are in and what drills are scheduled. As a coach, it helps to write everything down on a card in case people forget. Also, it helps to write the groups and drills on the board during meetings. In order for the individual period drill circuit paradigm to be effective, the position coach must essentially install his individual period every day. Intern coaches or student assistants can be available, if possible, to make sure they understand how the drills are set up and run.
A second requirement is having equipment organized early. Do not wait until the periods start to get organized. Stage every item necessary for the circuits close to the drill area. Time is the key element that is in play here. Not being organized will waste time and defeat the purpose of the circuits. Write down an inventory of what is needed for each day’s circuits and don’t let other coaches ‘borrow’ items. Your drills should be easy to set up and tear down. Everybody is working together. And that is a key hidden byproduct of the individual drill circuit paradigm.
Once the players in the unit see the value of the circuit and that everybody is getting more fundamental work, the players in the unit will embrace the circuits and the unit gains cohesion. The circuits are demanding. It’s a 10-minute thrash. It is very intense. But if done correctly they generate a sort of infectious momentum that aids the flow of practice. After a period of initial adjustment, the players generally embrace their own role in individual periods and a consensus of ‘being in this together’ begins to emerge.
Although the drill circuits have been a staple of ours for many years, the enforcement of COVID-19 guidelines has actually amplified the usefulness of the circuits. By taking a large group and breaking it up into three smaller groups, it becomes naturally easier to reinforce social distance protocols at practice. These days, when coaches can create a safer practice environment it is a net gain for everybody.
Now the fun part — the drills!
The circuits have been used for blocking and ball drills with our receivers in the past. This way our unit was able to get six drills in a 15-minute individual period. Ball security leads our individual period and gets its own five-minute block. If we got done with all the assigned drills for the day, we would add a bonus drill with everyone together, or a long water break. A good piece of advice for young coaches is to always have an extra drill in mind. This drill should be easy to set up for when you get some extra minutes after you are done everything you need to. Veteran position coaches have long kept an extra drill in their back pocket for when they had unexpected extra drill time. This should be a drill the players know and can get done quickly. Unlike the circuits, this will be one where everyone works together and gets a rep or two each. With either blocking or ball drills, you may want to have what everyone calls “everyday drills”, drills that you do almost every day to keep the technique and fundamentals strong. The more players do some of these drills the more the players become familiar with them which is where the circuits can really flourish.
Three ball drills we have done almost every day were: Notre Dame, Mini-Villanova, and Villanova. We break our ball drills down into how many catches the wide receiver is getting in that given drill. You can find other ways to break them down; this was just the easiest for us.
The Notre Dame Drill
This is one we use to focus on our wide receivers footwork and knee drive in and out of cuts. The take-off cone should be about five to seven yards away from the cones the wide receiver is attacking. Having one cone at the start, the other three should be arranged with two inline of the starting cone but about a yard or so apart. You can make the distance between these cones larger or smaller depending on how well your receivers perform the more you do the drill. The last cone should be off to the side of the furthest cone.
The wide receiver will get a good take-off attacking the cone furthest from him. Once they reach that they should break down and very tightly work around the cone going inside toward the cone behind them, as they work around that cone should then break off to the one-off to the side then break back towards the sideline or where they began. Based on where the coach stands this can either be a sideline toe touch catch or an over-the-shoulder fade ball scenario.
 The Notre Dame drill (figure 1) only involves one ball so, in our experience, this is where you let the group leader take control of during individual periods. Maybe as the coach, you run this one in the offseason during free time after workouts so players get familiar but after that players should be able to control this one on their own. I have found that the older guys teach the young guys and no one slacks off because they all want to get something out of the drill. It doesn’t take a ton of space to set up and is a quick hitter.
For the ball circuit, it is important to have drills that offer various challenges to players in terms of top-end footwork, hand-eye preparation, and ball skills. Also, try to find drills that are relatively easy to set up.
The Villanova Drill
 This (figure 2) is a 10-yard box that requires three footballs and three cones/chutes. A coach should manage any ball drills that require three or more balls. The receiver takes off from the sideline running toward the cone/chute one where he breaks down and makes a 45-degree curl break and catches ball one. It’s very important to emphasize tucking the balls away in multi-catch drills. After the catch, the receiver flips the ball out of the drill and makes another 45-degree cut. There is no ball at cone/chute two. As the receiver heads to cone/chute three he will make a 90-degree dig or out type break catching and tucking ball two. The final phase of Villanova entails the receiver making a speed cut around the cone/chute one to receive a boundary awareness catch for ball three.
It is critical to make sure the sideline area is cleared of equipment and players. Coach the receiver to focus on the ball and FEEL the sideline. To save time, have any players who are not running through the drill help track down the footballs.
The Mini-Villanova Drill
 This is another quick hitter but has two catches instead of just one. Mini Villanova (figure 3) is an 8×10-yard rectangle that requires two footballs, a pop-up dummy, a cone, and a hula hoop. The receiver takes off towards the pop-up and runs back in a 45-degree curl catching ball one. After a catch-and-tuck that mandates the receiver seeing himself tuck the ball away, he heads toward the cone. Like the Villanova drill, there is no ball thrown at the second breakpoint. Emphasize arm activity and knee expression on the exit of the break. As the receiver heads toward the hula hoop he’s coached to make a tight speed cut arc around the hoop. Emphasize arm activity as the receiver makes the speed cut. Ball two will be an obstructed view, sideline catch, with the pop-up serving a dual role in this drill set up. We want the receiver to lose the ball for an instant while he must also gauge his own proximity to the rapidly approaching sideline. This is a drill student interns or players could manage with some prior tips from the receivers coach. Anytime we are introducing a new drill we will go through a dry run pre-practice shakedown to make sure everybody sees the drill.
These are three drills we have used in our ball circuits in the past. If you have more or different drills try to mix it up each day and use different drills based on what tier of drill you think they are. It could be a fundamental you want to focus on that day, or very basic stuff if you are a new coach or have new players. We also use the circuit groups when we do blocking drills. With the same mindset, have different levels of drills so the players can handle some on their own and some you need to be there for coaching points or direction. The circuits are only effective if you have over nine or more wide receivers. Although this article focuses on drill circuits for wide receiver applications, other large position groups like defensive back and the offensive line can and have employed circuit drill systems.
» ALSO SEE: 4 Tips to Starting a Unified Sports Program
Today in 2020, coaching is much different than it was even six months ago, coaches are now doing much more than teaching skills. While player safety should always be the primary focus of any practice, today, coaching nearly pivots exclusively on building a safe environment. We think the drill circuit system can be an effective method to achieve social distancing, increase player repetition, and build unit chemistry. If an individual period is an extension of team stretch and serves as a way to ease into practice, the circuit system may not be a good fit. However, if you are searching for a way to develop all your players, build unit cohesion and jump-start mundane practices then it is an idea worth exploring.
The benefits of empowering student-athletes to grow as leaders increased reps for players, and building unit chemistry far outweighs the logistical challenges of the circuit system. Be the head coach of your unit. Embrace the challenge.
The individual drill circuit system is a real-life example of an old coaching maxim: Plan your work. Work your plan.
You Might Also Like