Breakdown drills for feeding the high post against zones
Young players who don’t have much experience playing against zone defenses often overlook the high post as a viable option. If you can get your players to flash to the middle as your team swings the ball, good things invariably happen — a drive, a quick return give-and-go pass, a pass down low to an open low-post player. All can lead to an open shot.
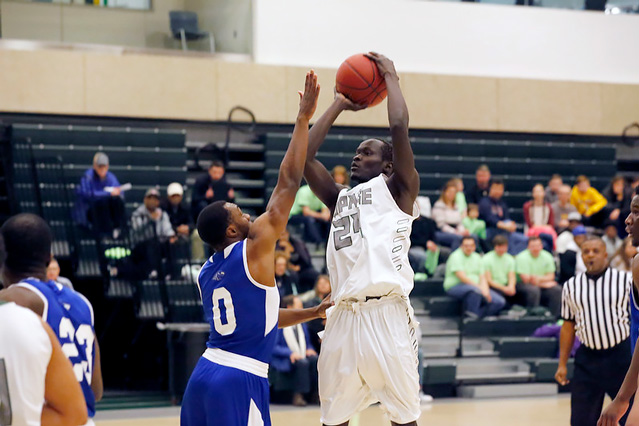
It’s easy to tell your players to flash to the middle and to show them in practice. Getting them to actually do it in live game situations is another matter.
World of difference
Having coached at the high school varsity level for many years, I was used to working with players who had experience playing against zones and had a general idea as to how to attack it. All I needed to do was to reinforce the high post as an option during practice.
Coaching junior varsity for the first time was different. I assumed that when I taught zone offense in a whole-part manner, the options would naturally show themselves to the players through practice and repetition.
Unfortunately, these players were often more concerned with their positioning on the floor as the ball rotated. They were more worried about moving from point A to point B instead of letting the game flow and naturally slipping into the open seams of the zone when the opportunities occurred.
After a lot of trial and error, I’ve come up with a teaching method that has worked in showing young players not only how to look into the high post, but how to flash into it and how to move off it once an entry pass has been made.
Zone offense drills series
The process of teaching your zone offense should begin in a whole-part method. This allows players to see what your team is running and what they should start to look for.
Techniques in running a zone offense are pretty universal. So, in putting this system together, you can try to keep it generic so it fits whatever offense you decide to run. At this point, you should be more concerned with having your players see the total flow of the offense as opposed to just concentrating on their individual parts.
After you’re confident that players know the offense, break the team into guards and forwards and begin the breakdown process with drills. In our program, our practices have strict time limitations, so we’ll often run just a few of these drills at any given time. But during the course of the season — if I know we’ll be playing an opponent that relies heavily on a zone defense — we’ll run the entire series. Once players learn the sequence, it takes roughly 25 to 30 minutes to get through the entire drill progression.
Guard progression series
 The following is the entire drill series progression to teach our players to feed the high post against zones.
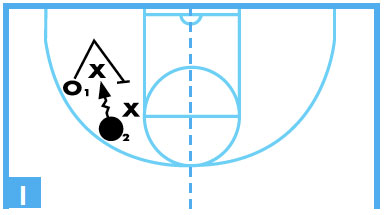
DIAGRAM: 1: 2-on-2 from the left side. Begin the drill progression with a quick game of 2-on-2. The only stipulation to this game is that players must stay on the left side of the court, and the offense must make one pass and one screen before they can shoot. If players cross into the right side of the court, they are out of bounds and lose possession.
For our team, playing 2-on-2 in this manner is effective because we want players to get used to starting the offense from the left side. We also don’t want them to be afraid of reversing the ball to that side. We’ll try and match teams up evenly.
Play one score and done; offense to defense and defense out (then the next team of two players comes in). Each team of two must keep track of how many points they’ve scored. Make it a competitive drill with winners getting drinks while losers run sprints.
Forward progression series
 DIAGRAM 2: Feed the high post, deny the high post. This drill begins with two forwards on the wings (W). A forward is at the high post (HP), and there is a post defender (D).
Play starts with a ball on the wing. The object is for the wings to pass the ball into the high post and then for the high post to make a strong offensive move and try to score. Before a wing can attempt a pass into the high post, they must reverse the ball to the opposite wing. This gives the defender an opportunity to get into defensive position and forces the high post to try and get open.
DIAGRAM 3: Feed the high post, deny the high post (continued). The wings pass the ball back and forth and can dribble down as far as the foul-line extended to gain a passing angle. The high-post player moves with the ball in an attempt to get open while the post defender does their best to deny the pass.
DIAGRAM 4: Feed the high post, deny the high post (continued). Once the high post catches the ball, stress the proper technique of turning to face the basket and tucking the ball in with elbows out in a sweeping-arc motion.
The high post is allowed one dribble for either a strong move to the basket with a jump stop or a quick jump shot. If the high post misses the shot, he or she must follow the shot for the put back while the defender tries to box out. If the high post can’t get off a shot, they may pass back out to one of the wings and the drill continues.
Forward & guards together
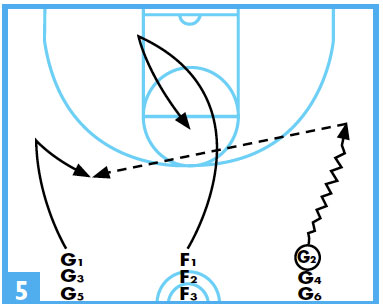 DIAGRAM 5: Feed the high post vs. zone. This sequence begins with three lines of players starting at half court. Forwards are always in the middle line, while guards are at the right and left. The ball starts on the right side (after a few rotations switch to the left side) with guards labeled G2. G2 dribbles hard down the side, comes to a stop, fakes a pass to the right (it’s important to fake to get the defense to move) and then passes to G1. G1 feeds the high post.
As the guards start up-court, so does the first forward in the middle line. He or she sprints up the middle to the post-up, low-block spot away from the ball and then flashes to the high post as G2 makes the pass to G1. After the high post catches the ball, he or she tucks the ball and turns, facing the basket in a triple-treat position. Remember, this drill is progressive and each of the following steps build upon each other until we have a seven-piece sequence.
 DIAGRAM 6: Feed the high post vs. zone (continued). Opposite guard (G2) cuts through the middle after the high post turns and faces the basket. After G2 cuts through, G1 follows. The high post passes to either guard for a jump shot or layup. The high-post player returns to the end of the forward line, while G1 goes to the end of the G2 line. G2 goes to the end of the G1 line.
» ALSO SEE: Progressions to build your full-court man defense
DIAGRAM 7: Feed the high post vs. zone (continued). After running the above drill for a predetermined amount of time, it’s time to have the high post attack the basket with a strong move or jump shot after G1 and G2 have made their cuts.
DIAGRAM 8: Feed the high post vs. zone (continued). Next, the high post fakes a move and passes back out to either guard for a jump shot. The guards are now on opposite sides from where they started.
DIAGRAM 9: Feed the high post vs. zone (continued). The high-post player fakes, passes out to a guard, and rolls to the basket for a return pass and power layup.
DIAGRAM 10: Feed the high post vs. zone (continued). Add defenders to mimic the top portion of a zone defense. In this diagram, we’ve added two defenders to simulate the top of a 2-3 zone. The defenders pressure the ball on one side, and on the other, try to front the high post.
Run the offensive portion as you had run the drill, except this time let the players freelance for the shot. Stress quick ball movements and reversal passes. The only stipulation is that they must reverse the ball once before looking to go into the high post.
Follow-up work
Once you complete this progression series, you should immediately run your zone offense in a shell format and play against a scout zone defense. By running these drills either as a whole series twice a week or individually everyday, you’ll see quick improvement in your team’s ability to attack a zone.
These drills are easy to learn, simulate game-like situations and can be adapted to teach man-to-man offensive techniques.
John Lacitignola coached varsity and junior varsity basketball in Geneseo, New York.


